Growing Bromeliads in Pots: A Comprehensive Guide
Growing Bromeliads in pots: Bromeliads are a diverse group of plants belonging to the Bromeliaceae family, native to tropical and subtropical regions of Central and South America.
With over 3,000 species and countless hybrids, bromeliads exhibit a wide range of shapes, sizes, and colors, making them popular choices for gardeners and plant enthusiasts alike. Bromeliads can be found in various habitats, including rainforests, cloud forests, arid deserts, and coastal areas.
In their natural habitat, bromeliads can be classified into three main types based on their growth habits:
Epiphytic bromeliads: These plants grow on trees, branches, or rocks without taking nutrients from their host. Instead, they rely on their surrounding environment’s humidity, air, and debris for sustenance. Epiphytes are the most common type of bromeliads and include popular genera like Tillandsia, Aechmea, and Vriesea.
Terrestrial bromeliads: As the name suggests, terrestrial bromeliads grow in soil and are often found in rocky, sandy, or shallow soil environments. They have a more robust root system than their epiphytic counterparts and can absorb nutrients directly from the soil. Examples of terrestrial bromeliads include species from the genera Dyckia, Hechtia, and Puya.
Saxicolous bromeliads: These bromeliads grow on rocks, cliffs, or other hard surfaces, utilizing their roots for anchorage rather than nutrient absorption. They often have adaptations to withstand harsh, exposed conditions. An example of a saxicolous bromeliad is the genus Pitcairnia.
Although bromeliads are native to tropical and subtropical regions, many species are highly adaptable and can thrive in various climates and indoor environments, making them suitable for pot cultivation. By understanding and replicating their natural habitat conditions, you can grow healthy and vibrant bromeliads in your home or garden.
Benefits of growing bromeliads in pots
Growing bromeliads in pots offer numerous advantages for both novice and experienced gardeners. In addition, these versatile plants can thrive in containers, providing several benefits:
Adaptability to indoor and outdoor settings: Bromeliads can be grown indoors or outdoors, depending on the specific variety and local climate. Potted bromeliads make excellent houseplants, as they can tolerate various light levels and indoor temperatures.
Outdoor potted bromeliads can add color and texture to patios, balconies, or other outdoor living spaces.
Easy maintenance: Bromeliads are generally low-maintenance plants that require minimal care. Growing them in pots makes it easier to control their environment, such as providing the appropriate soil mix, watering, and light conditions.
This controlled environment can also help prevent common pests and diseases that may affect bromeliads grown in the ground.
Flexibility in placement: Potted bromeliads can be easily moved and rearranged, allowing you to change the look of your indoor or outdoor space as desired.
This flexibility also makes it simpler to adjust their location to provide optimal light exposure and temperature conditions throughout the year.
Better control over growth: Growing bromeliads in pots allows you to manage their size and development more effectively, especially for larger or more vigorous species. You can choose a pot size that accommodates the plant’s needs while keeping it contained and preventing it from becoming overgrown.
Simplified propagation: When grown in pots, propagating bromeliads by dividing pups from the mother plant is more manageable. Separating and repotting pups can be done with minimal plant disruption, allowing you to expand your collection or share with friends and family.
Versatile design options: With a wide array of pot styles, materials, and colors available, you can choose containers that complement the unique appearance of your bromeliads. This flexibility enables you to create stunning plant displays tailored to your style and preferences.
The versatility and adaptability of bromeliads for indoor and outdoor settings
Bromeliads are renowned for their versatility and adaptability, making them an excellent choice for indoor and outdoor environments. Their ability to thrive in various conditions is attributed to their diverse range of species and natural habitats.
Indoor settings: Bromeliads make fantastic houseplants due to their ability to adapt to various light conditions and indoor temperatures. They can tolerate low, medium, and bright light environments, making them suitable for placement in different rooms within a home.
As many bromeliads are epiphytic, they can also adapt well to the typically lower humidity levels found indoors.
Their low-maintenance requirements and air-purifying properties also make them ideal for busy households or office spaces.
a. Light: Place your bromeliad near a window with filtered light, or use artificial light sources like fluorescent or LED grow lights to provide the necessary light for growth and color development.
b. Temperature: Most bromeliads can tolerate average indoor temperatures between 60-80°F (15-27°C), making them suitable for typical household conditions.
c. Humidity: Bromeliads prefer higher humidity levels but can still adapt to the lower humidity in most indoor environments. Using a humidifier, misting the leaves, or placing the pot on a tray with pebbles and water can help maintain adequate humidity.
Outdoor settings: In suitable climates, bromeliads can be used as eye-catching elements in outdoor gardens, patios, or balconies. Depending on the species and their natural growth habits, they can be grown in pots or mounted on trees, rocks, or walls.
a. Light: Outdoor bromeliads should be placed in a location that provides dappled or filtered sunlight. Too much direct sun may cause leaf scorch, while too little light can result in poor growth and color.
b. Temperature: Bromeliads can be grown outdoors year-round in frost-free climates. In areas with colder temperatures, they can be grown as annuals or moved indoors during winter months to protect them from frost.
c. Watering: Outdoor bromeliads may require more frequent watering, especially in hot or windy conditions. However, it is essential to avoid over-watering, as this can lead to root rot.
Popular bromeliad varieties for pot cultivation
There are numerous bromeliad species and hybrids suitable for growing in pots. Some popular varieties include:
Guzmania: Known for their brightly colored, long-lasting flower bracts, Guzmania bromeliads are popular for indoor and outdoor potted plants. Guzmania lingulata, also known as the scarlet star, is a widely grown species featuring vibrant red bracts.
Aechmea: Aechmea species are characterized by their rosette-forming leaves and stunning flower spikes. Aechmea fasciata, also known as the urn plant or silver vase, is famous for pot cultivation due to its striking pink flower bract and silver-banded leaves.
Neoregelia: Neoregelia bromeliads are admired for their colorful foliage, which often becomes more vibrant when exposed to bright light. Neoregelia carolinae, sometimes called the blushing bromeliad, is a popular variety with green leaves that turn red towards the center of the rosette.
Vriesea: Vriesea bromeliads are known for their attractive, flat, and feather-like flower spikes, as well as their patterned foliage. Vriesea splendens, the flaming sword, is a widespread species with a striking red flower spike and dark, horizontal banding on its leaves.
Tillandsia: Tillandsia, or air plants, are a unique group of bromeliads that do not require soil and can be grown in pots with minimal medium or mounted on various surfaces. Tillandsia ionantha, the sky plant, is a small and popular species often used in pot arrangements or terrariums.
Characteristics to consider when selecting a bromeliad
When selecting a bromeliad for your indoor or outdoor space, you must consider various characteristics to ensure the plant thrives and complements its surroundings. Some factors to consider include:
Size: Bromeliads come in various sizes, ranging from small air plants to large, ground-dwelling species. Consider the mature size of the plant and the available space in your home or garden to ensure it has enough room to grow without becoming overcrowded.
Light requirements: Different bromeliad species have varying light preferences. Some require bright, indirect light, while others can tolerate lower light levels. Consider the light conditions in your chosen location and select a bromeliad species that will thrive in that environment.
Growth habits: Bromeliads can be terrestrial, epiphytic, or saxicolous, which affects how they should be grown in pots. Terrestrial bromeliads need a well-draining soil mix, while epiphytic and saxicolous varieties may require little to no soil, instead preferring mounting on various surfaces or using a specialized growing medium.
Temperature and humidity: Bromeliads prefer warm temperatures and high humidity levels, but some species are more adaptable. Consider the climate and conditions in your location and choose a bromeliad that can tolerate those conditions, or be prepared to provide extra care to maintain the proper environment.
Foliage and flower: Bromeliads are known for their striking foliage and unique flowers. Consider the color, pattern, and texture of the leaves, as well as the appearance of the flower spikes or bracts, to select a plant that will complement your space and personal preferences.
Maintenance requirements: While most bromeliads are low-maintenance plants, some may require more care than others. Consider the watering, fertilizing, and pruning needs of the species you’re interested in and ensure you can commit to the necessary care for a healthy, thriving plant.
Hardiness: If you plan to grow bromeliads outdoors, consider their cold hardiness, as not all species can tolerate freezing temperatures. In colder climates, choose frost-tolerant species or be prepared to move your bromeliads indoors during winter.
Pot and soil selection
Choosing the right pot and soil for your bromeliad is essential for ensuring its health and growth. Here are some guidelines to help you select the appropriate pot and soil mix:
Pot selection:
a. Size: Choose a pot that accommodates the mature size of your bromeliad, allowing enough space for the roots to develop without becoming root-bound. Bromeliads generally have shallow root systems, so a wide and shallow pot is often suitable.
b. Material: Pots can be made from various materials, such as plastic, ceramic, terracotta, or metal. Each material has pros and cons, so choose one that suits your preferences and plant’s needs.
For example, plastic pots are lightweight and retain moisture well, while terracotta and ceramic pots are heavier, more breathable, and provide better drainage.
c. Drainage: Ensure the pot has drainage holes to prevent waterlogging and root rot. Bromeliads prefer well-draining conditions, so it’s essential to allow excess water to escape.
Soil selection
a. Terrestrial bromeliads: For terrestrial bromeliads, choose a well-draining, loose, and porous soil mix. A blend of equal parts peat moss, perlite, bark, or coconut coir is often suitable. You can also use a commercial orchid or bromeliad mix as a base and adjust it to your specific plant’s needs.
b. Epiphytic and saxicolous bromeliads: These bromeliads require little to no soil and can be grown in a mix of bark, coconut coir, or sphagnum moss. You can also mix orchid bark and perlite or a commercial epiphyte mix. Ensure the medium provides adequate drainage and aeration for the roots while retaining some moisture.
When potting your bromeliad, place a layer of drainage material, such as gravel or broken terracotta pieces, at the bottom of the pot to improve drainage.
Position the plant in the pot so its base is slightly above the soil line to prevent rotting. After potting, water the plant thoroughly to settle the soil mix and establish the bromeliad in its new home.
Proper watering techniques
Proper watering techniques are crucial for maintaining healthy and vibrant potted bromeliads. Here are some essential tips for watering your bromeliads correctly:
Frequency and quantity: Bromeliads generally have lower water requirements than other houseplants. Watering once a week or every 10 days is usually sufficient, depending on the species.
The pot size, soil mixture, and environmental conditions can affect watering frequency. Observe your plant and adjust the schedule as needed.
Watering method: Bromeliads have a unique central rosette called a “tank,” that captures and stores water in the wild. When watering, fill the central tank with water, ensuring it doesn’t overflow. Use a watering can with a long spout or a squeeze bottle for precise control.
Water the soil around the plant to keep the roots moist but not overly wet. Be sure to use well-draining soil to prevent waterlogged conditions leading to root rot.
Avoiding over-watering and root rot: Over-watering is a common issue with bromeliads and can lead to root rot, causing the plant to decline. To prevent this, always allow the top inch of soil to dry out between waterings.
Use pots with drainage holes to ensure excess water can escape, and empty the saucer under the pot after watering to prevent standing water.
Water quality:
Bromeliads are sensitive to chemicals commonly found in tap water, such as chlorine and fluoride. Therefore, using rainwater, distilled, or filtered water is recommended for optimal plant health.
If using tap water, allow it to sit for 24 hours before watering to let some of the chemicals evaporate.
Monitor humidity: Bromeliads prefer a humid environment, especially species with thinner leaves. Maintain humidity levels by occasionally placing the pot on a tray filled with water and pebbles, using a humidifier, or misting the plant’s leaves.
Fertilizer requirements and application
Fertilizer requirements and application for bromeliads are relatively minimal compared to other houseplants. However, nutrients can help them grow and produce more vibrant colors. Here are some tips for fertilizing your potted bromeliads:
Types of fertilizers
Bromeliads benefit from a balanced, water-soluble fertilizer with equal proportions of nitrogen, phosphorus, and potassium (e.g., 20-20-20 or 10-10-10).
Some bromeliad enthusiasts prefer using specific formulations designed for these plants, found at specialty garden centers or online.
Fertilizing frequency and methods:
Fertilize bromeliads sparingly, as too much fertilizer can harm their delicate roots and cause leaf burn. Generally, fertilizing every 4-6 weeks during the growing season (spring and summer) is sufficient.
Dilute the fertilizer to 1/4 or 1/2 of the recommended strength to avoid over-fertilizing. You can also use a slow-release fertilizer to provide a steady supply of nutrients over time.
Application techniques
When applying liquid fertilizer, water the soil around the plant’s base, avoiding the central tank or rosette, as it may cause the plant to rot.
You can use a foliar spray fertilizer for air plants (Tillandsia species), which don’t grow in soil.
Mist the leaves lightly with the diluted fertilizer solution, ensuring even coverage. Allow the plant to dry fully before placing it back in its display.
Adjusting fertilizer based on the plant’s needs:
Bromeliads with greener leaves generally require more nitrogen. Those with colorful leaves, such as Aechmea and Neoregelia, benefit from a fertilizer with a higher phosphorus content to enhance their vibrant hues.
Pay attention to your plant’s growth and adjust the fertilizer type or application frequency as needed. For example, if you notice leaf tips turning brown, reduce the amount or frequency of fertilizer application.
Ideal light conditions for bromeliads in pots
Bromeliads are adaptable plants and can tolerate various light conditions. However, providing the ideal light conditions for your potted bromeliads will help them thrive and showcase their vibrant colors. Here are some guidelines for ensuring optimal light exposure:
Natural light: Most bromeliads prefer bright, indirect sunlight, so placing them near a window with filtered light is ideal. An east or west-facing window is typically suitable.
Some bromeliad species, like Neoregelia and Vriesea, can tolerate lower light levels, making them suitable for rooms with less direct sunlight.
Artificial light: If you don’t have access to sufficient natural light or want to provide supplemental lighting, artificial light sources like fluorescent or LED grow lights can be used.
Position the light source 12-18 inches above the plant and maintain a 12-14 hour daily photoperiod.
Signs of inadequate or excessive light exposure: Inadequate light can cause bromeliads to lose their vibrant colors and become leggy, with elongated leaves and weak growth. If you notice these signs, move the plant to a brighter location or add supplemental lighting.
Excessive light can lead to leaf scorch, bleaching, or sunburn, appearing as yellow or brown spots on the leaves. If your bromeliad shows signs of sunburn, move it to a location with less direct sunlight or provide shade during peak sunlight hours.
Light and temperature considerations: Bromeliads can tolerate a wide range of temperatures, but it’s essential to keep them away from extreme temperature fluctuations, such as drafts from air conditioners or heaters.
Placing them near a window with good light exposure but away from direct drafts will help maintain consistent temperature conditions.
Pruning and propagation
Pruning and propagation are essential aspects of maintaining healthy and attractive potted bromeliads. Proper pruning can enhance their appearance, while successful propagation allows you to expand your collection or share your plants with others. Here’s a guide to effectively pruning and propagating bromeliads:
Pruning:
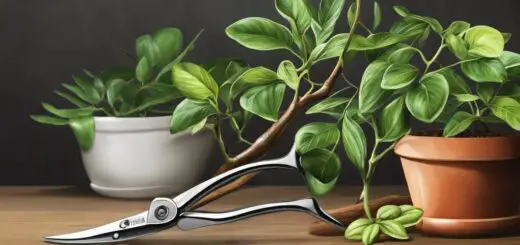
Removing dead leaves: Regularly inspect your bromeliad for dead or dying leaves. Then, gently remove them by peeling or cutting them away at the base using a clean pair of scissors or pruning shears.
This process helps maintain the plant’s appearance and prevents pests and diseases from taking hold.
Maintaining the central rosette: Bromeliads grow in a rosette pattern, with new leaves emerging from the center. Keep the central rosette clean and debris-free, as accumulated material can cause rot.
Avoid cutting healthy leaves in the central rosette, as this can hinder the plant’s growth and overall health.
Propagation:
When and how to separate pups from the mother plant: Bromeliads produce offshoots or “pups” as part of their natural growth cycle. These pups can be separated from the mother plant when they reach about one-third to one-half the parent’s size.
To separate a pup, use a clean, sharp knife to cut it away from the mother plant at the base, including some roots if possible. Be careful not to damage the mother plant or the pup during the process.
Caring for and potting new bromeliad pups: Allow the freshly cut pup to dry for a day or two in a shaded area, which helps the cut surface to heal and reduces the risk of rot.
Once the cut has dried, pot the pup in a small container using well-draining bromeliad soil mix. Ensure the base of the pup is level with the soil surface, and avoid burying the leaves.
Water the pup lightly and maintain a consistent watering schedule. Keep the new plant in bright, indirect light until it establishes itself, then adjust light conditions according to the specific bromeliad species’ requirements.
Common pests and diseases
Bromeliads are generally resilient plants but can still be affected by pests and diseases. Early detection and intervention are essential to keep your potted bromeliads healthy. Here are some common pests and diseases and how to address them:
Common Pests:
Mealybugs: These small, white, cottony insects suck the sap from the plant, causing the leaves to yellow and wilt.
Control measures include:
- Removing the bugs with a cotton swab dipped in rubbing alcohol.
- Using insecticidal soap.
- Introducing natural predators like ladybugs.
Scale insects: These pests appear as small, brown, or tan bumps on the leaves and stems, and they feed on the plant’s sap, leading to yellowing and dropping leaves.
Control methods include:
- Scraping the insects off with a toothbrush or soft cloth.
- Applying horticultural oil or neem oil.
- Using a systemic insecticide.
Spider mites: These tiny pests create fine webbing on the plant and cause the leaves to develop a stippled, yellow appearance.
Control spider mites by increasing humidity, using a miticide, or introducing predatory mites.
Diseases:
Root rot: Root rot is typically caused by over-watering, leading to fungal or bacterial infections. Symptoms include yellowing leaves, wilting, and an overall decline in the plant’s health.
To treat root rot, remove the plant from its pot, trim away the affected roots, and repot in fresh, well-draining soil. Adjust your watering schedule to prevent a recurrence.
Leaf spots: Fungal or bacterial infections can cause leaf spots, which appear as discolored or necrotic areas on the leaves.
To prevent leaf spots, maintain good air circulation around your plants, avoid over-watering, and remove affected leaves. Fungicides or bactericides can be used if necessary.
Prevention and Treatment Methods:
Regular inspection and early intervention: Inspect your bromeliads regularly for signs of pests or diseases. Early detection and intervention are crucial for successful treatment and prevention.
Good cultural practices: Maintain proper watering, light, and temperature conditions to keep your bromeliads healthy and less susceptible to pests and diseases.
Organic and chemical treatment options: Whenever possible, choose organic treatments, like neem oil or insecticidal soap. However, chemical treatments may be necessary for severe infestations or infections. Always follow the product instructions and avoid overuse.
Final Thoughts
Growing bromeliads in pots can be a rewarding and enjoyable experience, providing you with beautiful and unique plants that enhance your indoor or outdoor spaces.
By understanding and implementing proper care techniques, such as choosing the right pot and soil, maintaining optimal watering and fertilizing practices, and addressing common pests and diseases, you’ll ensure the health and longevity of your potted bromeliads.
In addition, as you gain experience and confidence, you can explore the wide variety of bromeliad species available, further enriching your collection and deepening your connection with these fascinating plants.