The Ultimate Guide to Spider Plant Care: Tips and Tricks
Spider plant care: Spider plants, scientifically known as Chlorophytum comosum, are popular houseplants native to tropical and subtropical regions of Africa. They belong to the Asparagaceae family and are well-known for their resilience and low-maintenance nature, making them an ideal choice for beginner and experienced plant enthusiasts.
Spider plants are characterized by their long, arching leaves that form a rosette, with colors ranging from solid green to variegated green and white or green and yellow patterns.
The leaves can grow 12-18 inches long and 0.5-1 inch wide. These plants get their name from the small plantlets, or “spiderettes,” that grow on long, thin stems (stolons) and resemble spiders hanging from a web.
In addition to their aesthetic appeal, spider plants are known for their air-purifying abilities. They are excellent at removing common indoor air pollutants such as formaldehyde, benzene, and xylene, improving overall air quality in homes and offices.
Their adaptability to various growing conditions and relatively minimal care requirements make spider plants a favorite among houseplant enthusiasts.
Benefits of having spider plants in your home
Having spider plants in your home can offer a range of benefits for your living environment, personal well-being, and even your health. Some of the key benefits include:
Air purification: They are known for filtering out common indoor air pollutants such as formaldehyde, benzene, and xylene. This helps improve the air quality in your home, making it a healthier environment for you and your family.
Improved humidity: They release moisture into the air through transpiration. This can help maintain a comfortable humidity level in your home, particularly during dry winter when indoor air tends to dry.
Low-maintenance: They are adaptable and can tolerate various growing conditions. They are also relatively easy to care for, making them an ideal choice for beginners and experienced plant enthusiasts.
Aesthetic appeal: The attractive foliage and unique growth habit of spider plants can add a touch of natural beauty to your living space. They are versatile and can be displayed in hanging baskets, placed on shelves, or used as a centerpiece on a table.
Stress reduction: Caring for houseplants like spider plants has been shown to reduce stress and promote well-being. Nurturing a living plant can have a calming effect and be a form of relaxation.
Boosted productivity and concentration: Studies have shown that having plants in your living or working space can improve productivity, focus, and cognitive function. In addition, the presence of greenery is believed to have a positive impact on mental health and overall well-being.
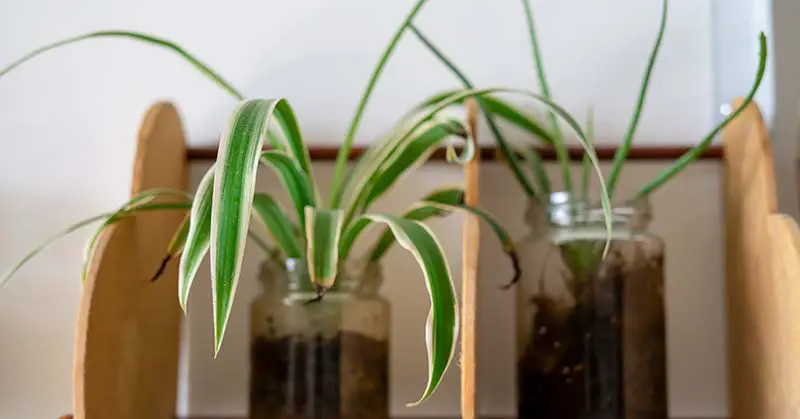
Easy propagation: They produce plantlets or “spiderettes” that can be easily propagated to grow new plants. This allows you to share the joy of growing them with friends and family or expand your indoor garden.
Different varieties of spider plants
They come in several varieties that vary in leaf color and pattern. Some of the most popular types include:
Chlorophytum comosum ‘Vittatum’: This variety features long, arching leaves with a creamy-white stripe running down the center and green edges. It is one of the most common and well-known varieties of spider plants.
Chlorophytum comosum ‘Variegatum’: The ‘Variegatum’ variety has green leaves with white margins on the edges. The contrast between the green and white gives this plant an attractive appearance.
Chlorophytum comosum ‘Reverse Variegatum’: As the name suggests, this variety has the opposite color pattern of the ‘Variegatum,’ with white leaves and green margins along the edges.
Chlorophytum comosum ‘Bonnie’: The ‘Bonnie’ variety features curly or wavy leaves with green and white stripes. Its leaves are more compact, and it has a unique, whimsical appearance compared to other spider plant varieties.
Chlorophytum comosum ‘Mandaianum’: This variety has solid green leaves without any variegation. It is less common than the variegated varieties but still offers the exact easy-care nature and benefits of other spider plants.
Chlorophytum comosum ‘Zebra Grass’: This variety has striking green leaves with yellow stripes, giving it a bold appearance. The yellow stripes make it stand out among other spider plant varieties.
Chlorophytum comosum ‘Lemon’: The ‘Lemon’ variety has light green leaves with a yellow central stripe. This subtle color variation adds a touch of brightness to the plant.
Factors to consider when selecting a spider plant
When selecting one for your home or office, there are several factors to consider to ensure you choose a plant that will thrive in your space and meet your aesthetic preferences:
Variety: As mentioned earlier, several varieties have different leaf patterns and colors. Choose a type that appeals to you and complements your interior design.
Size and shape: Consider where you plan to place your plant. Some varieties may be more compact or have a unique growth habit that suits your space better. However, keep in mind that spider plants can grow relatively large, so make sure you have enough room for the plant to grow and spread.
Color and variegation: Different varieties have different colors and variegation patterns. Choose a spider plant that has the color and pattern you find most attractive.
Overall health:
- When purchasing a spider plant, inspect it for signs of good health.
- Look for vibrant green leaves with no signs of yellowing, wilting, or browning.
- Check the roots if possible; healthy roots should be white or light tan and not mushy or discolored.
Pest-free: Sift through the plant for signs of pests, such as spider mites, aphids, or scale insects. A healthy, pest-free plant is more likely to thrive in your home.
Source: Buy your plant from a reputable nursery, garden center, or online retailer. This will ensure that you receive a healthy, well-cared-for plant.
Container and potting mix: They prefer well-draining soil and a container with drainage holes to prevent root rot. Consider the type of potting mix and container you will need for your spider plant before selecting.
Light requirements
They are adaptable and can tolerate various light conditions. However, providing the right light is vital to promote healthy growth and maintain their vibrant colors. Here are the ideal light requirements for spider plants:
Bright, indirect light: They thrive in bright, indirect light near a north-facing or east-facing window. This light level allows them to grow and maintain their variegation without the risk of sunburn or excessive fading.
Tolerant of lower light levels: Although they prefer bright, indirect light, they are adaptable and can tolerate lower light levels. However, if placed in low-light conditions for extended periods, their growth may become leggy, and their variegation may fade.
Avoid direct sunlight: While they can handle some early morning or late afternoon sun, prolonged exposure to direct sunlight can scorch their leaves, causing them to turn brown or yellow. It’s best to protect your plant from the harsh midday sun by using sheer curtains or moving it to a shadier spot.
Effects of too much or too little light
They are adaptable and can tolerate various light conditions, but providing them with the proper lighting is crucial for their overall health and appearance. Here are the effects of too much or too little light on them:
Too much light
Scorched leaves: Prolonged exposure to direct sunlight can cause the leaves of spider plants to become scorched, leading to brown or yellow patches on the leaves. This can diminish the plant’s appearance and overall health.
Fading colors: Excessive sunlight can cause the vibrant colors and variegation of plant leaves to fade, making them appear washed out.
Leaf curling: Overexposure to sunlight may cause the leaves to curl or become distorted as a defense mechanism against harsh light.
Too little light
Leggy growth: Inadequate light can lead to leggy growth, where the plant becomes elongated and spindly to reach more light. This can result in a weaker, less attractive plant.
Loss of variegation: Spider plants with variegated leaves may lose color patterns in low-light conditions. The leaves may turn more solid green, which is the plant’s way of maximizing its ability to photosynthesize in low light.
Slow growth: Insufficient light can cause them to grow more slowly or even stop altogether.
Fewer plantlets: They may produce fewer plantlets or “spiderettes” when not receiving enough light, as their energy is directed toward basic survival rather than reproduction.
Temperature and humidity preferences
They are native to tropical and subtropical regions, so they prefer temperatures and humidity levels that mimic their natural environment. Here are the ideal temperature and humidity preferences for these plants:
Temperature
Ideal range: They thrive in temperatures between 65-75°F (18-24°C) during the day and slightly cooler temperatures at night, around 55-65°F (13-18°C).
Tolerance for temperature fluctuations: While they can tolerate short periods of temperature fluctuations, it’s essential to avoid exposing spider plants to extreme temperatures, as this can cause stress and damage to the plant.
Avoid drafts and cold temperatures: Keep your plant away from drafty areas, air conditioning vents, or cold windows during winter, as exposure to cold drafts can lead to leaf damage and overall stress for the plant.
Humidity
Ideal range: They prefer moderate to high humidity levels, ideally between 40-60%. This mimics their natural tropical environment and helps keep their leaves looking healthy and vibrant.
Ways to increase humidity: In dry indoor environments or during winter months when indoor air tends to be drier, you can increase humidity around your plant by:
a. Placing a tray filled with water and pebbles beneath the pot, ensure the pot is not directly sitting in the water.
b. Regularly misting the plant with water.
c. Using a humidifier near the plant increases the humidity in the surrounding area.
d. Grouping plants together, as they release moisture through transpiration and create a more humid microclimate.
Soil mix and potting recommendations
Choosing the right soil mix and pot for your spider plant is crucial to ensure proper drainage and aeration, which promotes healthy root growth and overall plant health. Here are the ideal soil mix and potting recommendations for these plants:
Soil Mix
Well-draining mix: Spider plants need well-draining soil to prevent root rot and other issues caused by excess moisture. A high-quality, well-draining potting mix that contains a blend of peat, perlite, and vermiculite works well for spider plants.
Adding amendments: You can further improve the drainage and aeration of the soil mix by adding extra perlite, bark chips, or coarse sand. This will help ensure that water flows freely through the soil and does not cause the roots to become waterlogged.
Potting
Choose a pot with drainage holes: Select a container with drainage holes at the bottom to allow excess water to escape and prevent root rot. This is especially important for spider plants, which are sensitive to overwatering and stagnant water.
Pot size: Choose a pot slightly larger than the root ball of the spider plant. Spider plants have a relatively small root system, so they do not need a huge pot. However, giving them room to grow is essential for their overall health.
Pot material: These plants can be grown in various pot materials, including plastic, ceramic, and terracotta. Each material has its pros and cons.
For example, plastic pots retain moisture better but may provide less stability for larger plants. Ceramic and terracotta pots offer better stability and breathability but may require more frequent watering due to increased evaporation.
Repotting: Spider plants typically need to be repotted every 2-3 years or when they become root-bound. When repotting, choose a new pot that is 1-2 inches larger in diameter than the previous pot and use a fresh, well-draining soil mix.
Proper watering techniques
Proper watering is essential for maintaining the health of your plant. However, overwatering or underwatering can lead to various issues, such as root rot or wilted leaves. Here are some tips for proper watering techniques for these plants:
Check the soil moisture: Before watering, check the soil’s moisture level by inserting your finger about an inch into the ground. If the top inch feels dry, it’s time to water your spider plant. If it still feels moist, wait a few more days before checking again.
Water thoroughly: When watering, soak the soil evenly until the water starts to drain out of the bottom of the pot. This ensures that the water reaches the entire root system and prevents dry pockets of soil within the pot.
Allow excess water to drain: After watering, allow any excess water to drain out of the pot completely. Never let your plant sit in standing water, as this can lead to root rot and other issues.
Adjust watering frequency: Watering your spider plant will depend on factors such as the size of the pot, the type of soil mix, and the environmental conditions in your home.
Generally, these plants must be watered approximately once a week during the growing season (spring and summer) and every two weeks during the dormant season (fall and winter).
However, always check the soil moisture before watering and adjust the frequency based on your plant’s needs.
Be mindful of temperature and humidity: In hot and dry environments or during winter, indoor heating can lower humidity levels, so your plant may require more frequent watering. Conversely, the plant may need less regular watering in cooler or more humid conditions.
Fertilizer requirements
Fertilizing your spider plant provides it with essential nutrients to support healthy growth, vibrant foliage, and the production of plantlets. Here are the fertilizer requirements for spider plants:
Type of fertilizer: Use a balanced, water-soluble houseplant fertilizer for your spider plant. A balanced fertilizer has equal proportions of nitrogen (N), phosphorus (P), and potassium (K), such as a 10-10-10 or 20-20-20 formula.
Fertilizing frequency: During the growing season (spring and summer), fertilize your spider plant every 4-6 weeks. This gives the plant the nutrients it needs for optimal growth and development.
Reduce fertilization during dormancy: In the dormant season (fall and winter), reduce fertilization to once every 2-3 months or stop altogether. This is because spider plants grow more slowly during this time and do not require as many nutrients.
Dilute the fertilizer: To prevent over-fertilization and potential damage to your spider plant, dilute the fertilizer to half the recommended strength indicated on the product label.
Application method: When fertilizing your spider plant, mix the diluted fertilizer solution with water and apply it evenly to the soil, ensuring not to splash on the leaves. Water your plant thoroughly before and after using the fertilizer to help prevent root burn.
Pruning and maintaining your spider plant
Pruning and maintaining your spider plant helps to promote healthy growth, maintain its attractive appearance, and encourage the production of plantlets. Here are some tips for pruning and maintaining your spider plant:
Remove dead or damaged leaves: Regularly inspect your spider plant for any dead, yellowing, or damaged leaves. Use clean, sharp scissors or pruning shears to remove these leaves at their base to maintain the plant’s appearance and prevent spreading diseases or pests.
Trim brown leaf tips: If the tips of your spider plant’s leaves turn brown, it could be due to low humidity, over-fertilization, or tap water with high salts or chemicals. First, trim the brown tips using clean scissors, cutting at an angle to maintain the natural shape of the leaves. Then, address the underlying cause by adjusting the plant’s environment or watering practices.
Prune long or overgrown leaves: If your spider plant becomes too large or unruly, you can trim back long or overgrown leaves to maintain their shape and size. Cut the leaves back to the desired length, ensuring not to remove more than one-third of the plant’s total foliage at one time.
Remove spent flower stalks: After your spider plant has finished flowering, remove the spent flower stalks to encourage the plant to focus its energy on producing new growth and plantlets.
Manage plantlets: When your spider plant produces plantlets, you can remove them and propagate new plants or let them grow on the mother plant. To propagate plantlets, gently remove them from the mother plant and place them in water or moist soil until they develop roots. Once they have established roots, you can transplant them into their pots.
Repot as needed: Spider plants typically must be repotted every 2-3 years or when they become root-bound. Choose a new pot that is 1-2 inches larger in diameter than the previous pot, and uses fresh, well-draining soil mix when repotting.
Common pests and diseases
Spider plants are generally hardy and low-maintenance; however, they can occasionally be affected by pests and diseases. Here are some common pests and diseases that may affect spider plants and how to address them:
Pests
Spider mites: These tiny, spider-like creatures can cause damage by sucking sap from the plant, leading to yellowing leaves and declining overall health. To treat spider mites, spray the plant with water to dislodge them or use a miticide or insecticidal soap according to the product instructions.
Aphids: These small, soft-bodied insects feed on plant sap, causing curled or distorted leaves and a decline in the plant’s health. To control aphids, you can spray the plant with water to dislodge them, use insecticidal soap, or introduce beneficial insects, such as ladybugs, to control the aphid population.
Scale insects: These small, flat, brown insects feed on plant sap and can cause yellowing leaves and a decline in the plant’s overall health. To remove scale insects, manually scrape them off with a toothbrush or use a cotton swab dipped in rubbing alcohol.
In more severe cases, apply horticultural oil or insecticidal soap according to the product instructions.
Diseases
Root rot: Caused by overwatering or poor drainage, root rot is a fungal disease that results in the decay of the plant’s roots. Signs of root rot include yellowing leaves, wilting, and a foul smell from the soil.
To treat root rot, remove the affected plant from its pot, trim away any damaged roots, and repot the plant in fresh, well-draining soil. Be sure to water the plant properly and avoid overwatering in the future.
Leaf spot: Caused by various fungal or bacterial pathogens, the leaf spot appears as small, discolored spots on the leaves. To treat leaf spot, remove the affected leaves, increase air circulation around the plant, and avoid getting water on the leaves when watering.
According to the product instructions, you may need to apply a fungicide or bactericide in more severe cases.
Prevention is the best approach to keep your spider plant healthy and free from pests and diseases. First, ensure your plant has proper growing conditions, such as well-draining soil, adequate light, and appropriate water and humidity levels.
Regularly inspect your plant for signs of pests or diseases, and address any issues immediately to maintain its overall health.
Final Thoughts
Spider plants are popular, low-maintenance houseplants that can thrive with proper care and attention. You can ensure your spider plant remains healthy and vibrant by balancing light, temperature, humidity, and water.
Additionally, it’s essential to use appropriate soil mix, potting, fertilizing, and pruning techniques to promote the plant’s overall well-being.
Finally, regularly inspect your spider plant for signs of pests or diseases and take preventive measures to maintain its health. With proper care, your spider plant can reward you with lush foliage, air-purifying benefits, and the joy of propagating new plants from its plantlets.


